A snow cave makes a great emergency shelter for back country skiers and snowboarders who get caught in bad weather situations.
When temperatures drop or winter storms bring strong winds and heavy snowfall, seasoned mountaineers prefer to sleep in a snow shelter, rather than a tent. A snow cave takes more time to build, but is more secure than a tent. In cold weather a snow cave is also much warmer.
Snow caves are best suited to locations where you can burrow into a snow-covered hillside. A strong and stable cave requires somewhat firm (consolidated) snow. The snow must also be deep enough to leave about two-feet of ceiling thickness.
Several people can shelter in one snow cave. A well-built cave dug in the firm snow is a very secure structure. However, if the outside temperature is warming toward freezing, a tree shelter may be a better choice. The weight of a collapsed snow-cave roof could cause serious injury to people underneath.
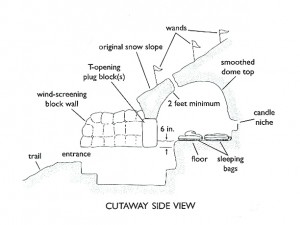
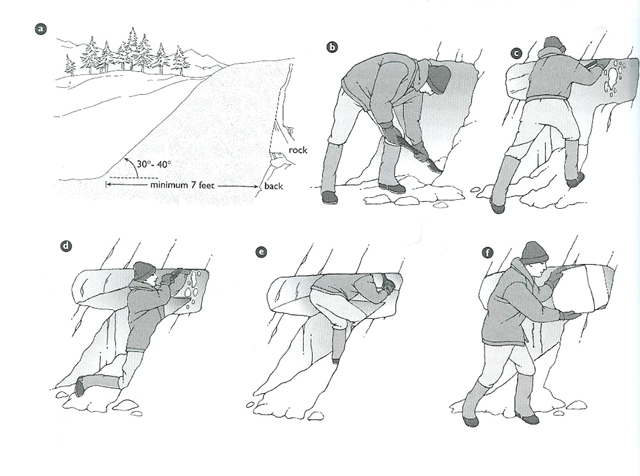
Find a short seven feet minimum – 30 to 40 degree slope or snow drift, that is clear of any potential avalanche hazard. It is easier to dig the cave into a steep slope than a gentle one. The snow must be deep enough that you will not hit ground before you finish excavating the entire cave. Dig an entry that is 1.5 feet wide and five feet high. Then create a construction-debris exit slot by digging a waist high platform centered on the entryway, forming a “T” that is four feet wide by 1.5 feet high.

Develop this platform so that it forms a horizontal slot extending into the slope, providing a temporary exit-way for all the snow being shoveled out as the interior of the cave is excavated. Excavate so that the cave floor is about six inches higher than the bottom level of the horizontal slot.
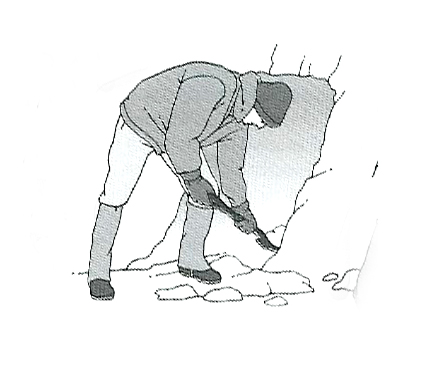
Create the main room of the cave by digging inward from the entry and expanding the room to the front, sides and upward; all directions except down. Shovel snow out through the horizontal slot. A second person working outside, can can clear the snow away. Extend the original entry hallway another two feet into the slope permitting the excavator to get farther into the cave to continue excavating outward and upward. Now it should be nearly possible to stand inside. continue to excavate, now out of the wind. When enough snow has been cleared to to allow the excavator to sit upon the main cave floor, another person can enter and help continue to expand the cave in all directions except downward.
Excavate until the inside dimensions are about five feet from front to back, by seven feet wide and 3.5 feet high; a comfortable minimum for two people. Make the cave larger for more occupants but remember that a small cave is warmer than a larger one. Keep a minimum of two feet of firm snow on the slope above the cave ceiling to provide enough strength to keep the roof from collapsing. Avoid building a flat ceiling. The more dome-shaped the ceiling contour, the stronger it will be and the less it will sag.

Fill in the temporary horizontal slot with snow blocks; one large block or two smaller blocks leaning against each other may be sufficient to close the slot. Cut any spaces around the blocks with snow. The top of the completed entrance tunnel should be at leas six inches lower than the cave floor, keeping war air in the cave and cold drafts out. Use snow blocks to build a wind-screening wall on either side of the entry path. Poke a pair of ski-pole basket sized ventilation holes through the ceiling of the cave from the inside out. This is important to prevent asphyxiation of the snow cave occupants. If it gets too warm inside the cave, enlarge these holes. Remember to not use a camp stove inside the cave. Cook outside at the entrance open air.
Smooth the domed ceiling of the cave’s interior so that it is free of any bumps or protrusions. Scratch a small ditch all around the base of the wall to channel any melt water away from the floor. Place a ground sheet on the floor to help keep things dry and prevent loss of equipment in the snow. Keep stormy weather out by putting a small tarp or a pack over the entrance, but leave some opening for ventilation air to flow in. To ensure that no uninvited guests drop in, mark the area around the cave so that someone doesn’t walk onto the roof. When you are finished using the cave, collapse it so that it does not present a hazard for others.
Reprinted with permission Mountaineering Freedom Of The Hills 7th Edition The Mountaineers 1001 SW Klickitat Way, Suite 101 Seattle, WA 98134


2 thoughts on “How To Build A Snow Shelter”